SAIF L2TP VPN - Windows 1. Before setup L2TP VPN on Windows PC, you must create a registry value, follow these steps: 1) For Windows 7, click Start > Run and type regedit. For Windows 8 and Windows 10, right click Start > Run and type regedit. 2) Locate the entry HKEY_LOCAL_MACHINE\SYSTEM\CurrentControlSet\Services\PolicyAgent. On the Edit menu, point to New, and then click DWORD (32-bit) Value. Type AssumeUDPEncapsulationContextOnSendRule and press Enter. Modify the new entry and change Value Data from 0 to 2. 3) Reboot the computer and try to setup the VPN connection.
2. Find out a network icon at the right down corner of the screen, Right click the icon and select "Open network And Sharing Center". 3. If you are using a wireless connection the network icon will look like this instead: 4. Click "Setup a new connection or network". 
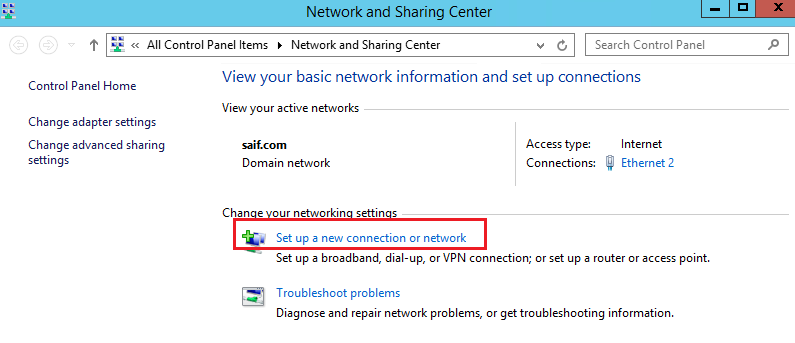
5. Click "Connect to a workplace". 
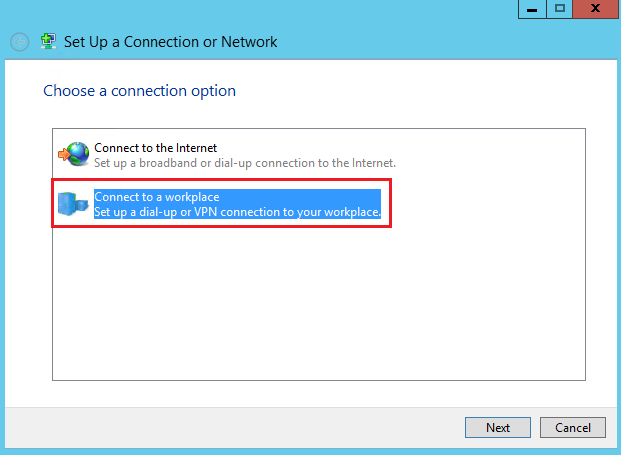
6. Click "Use my Internet connection (VPN)". 7. When the window below appears, enter the Internet address as the following: ● To access oversea website or your office PC or intranet computing server, enter the address as l2tpvpn.saif.sjtu.edu.cn ● The Destination name: is just what you want to call this connection. It can be anything, but SAIF L2TP VPN is good:- And select Don't connect now..., then click Next. 
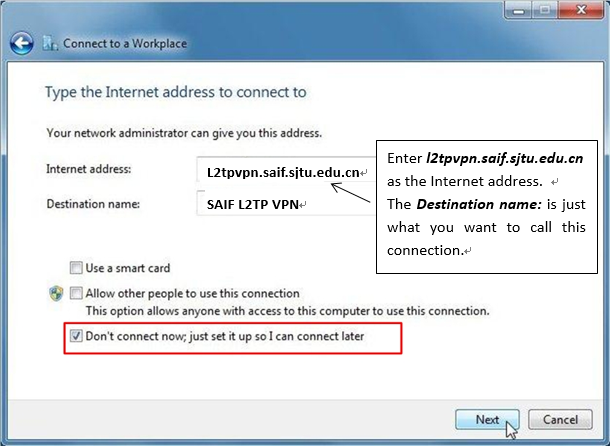
8. Enter your SAIF username and password. Select Remember this password if you wish. Leave the Domain (optional): box blank. And click Create 
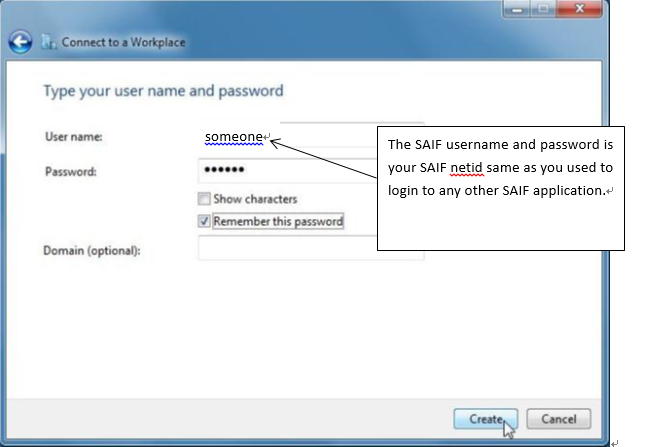
9. Change the vpn type and security option of the VPN connection you just created. a. Right click the network icon at the right down corner of the screen. And click open network and share center. b. Select Change adapter settings. c. Right click the VPN connection you just created and select properties. d. Under the Security tab: ● Change Type of VPN to "Layer 2 tunneling protocol with IPsec (L2TP/IPsec)". ● Change the data encryption to "Require encryption (disconnect if server declines)". ● Change Allow these protocols to Microsoft CHAP Version 2 (MS-CHAP v2). 
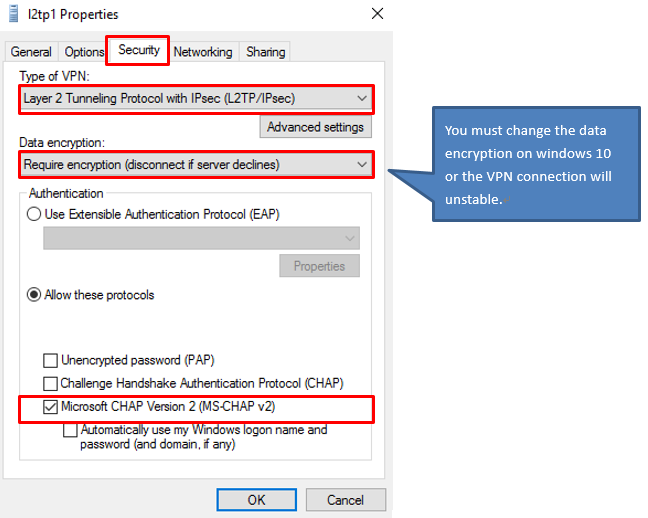
Click "Advanced settings" and enter the key "090419" 10. Connect to the VPN on Windows PC. ● To connect to the VPN on windows 7 Find out a network icon or wireless icon ( if you are using wireless) at the right down corner of the screen, click the icon and right click the vpn tunnel you just created and select Connect.
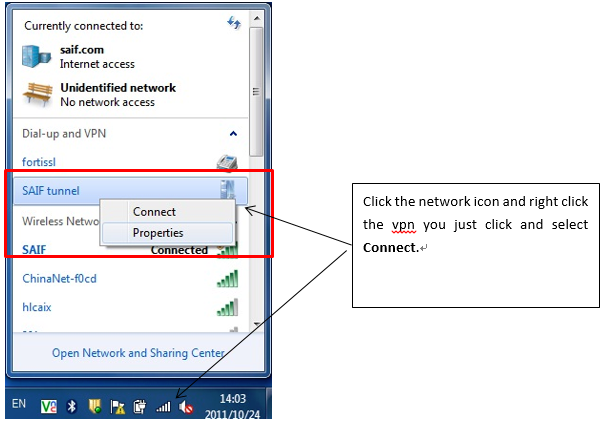
● To connect to the VPN on windows 8 From the "Charms Bar" (place mouse cursor in lower right corner of screen to open the bar), click the "Settings" iconClick the "Wireless" icon. Select "SLU VPN" and click "Connect". Enter your SAIFusername and password. Click OK. ● To connect to the VPN on windows 10 Click on the "Wireless" icon or "Wire" icon on the bottom right of the screen. Above the available connections the VPN should appear. Click the VPN connection you just created. You will now see your new VPN connection in the Network & Internet settings panel. To connect to the VPN server, click the name of the connection you just created, then click Connect.